The Google Fan, is a Google Assistant controlled stand fan using Nordic Semiconductor nRF7002 DK. You can use voice commands to turn on the fan and set the fan speed.
AWS IOT Vaccine Carrier Cold Box
This project won the grand prize at Hackster.io Reinventing Healthy Spaces with Amazon Web Services. I did this project with a rule to keep it simple and not over complicate the project idea. Overall it took me 2 weeks to finish this project working more than 10 hours a day.
Maduino Zero 4G GPS Tracker
For a 4G GPS tracker project I choose Makerfabs Maduino Zero 4G LTE(SIM7600X) Board. Because it has all the features needed to evaluate SIMCom 7600X.


Hardware Requirements:
- Maduino Zero 4G LTE(SIM7600X).
- 3.7V Lithium Ion Battery (optional).
- USB-A to USB-C cable.
- Sim card with data subscription.
Note: For Philippines select SIM7600E-H or SIM7600G-H.
Software Requirements:
- Blynk with plus plan to include map widget.
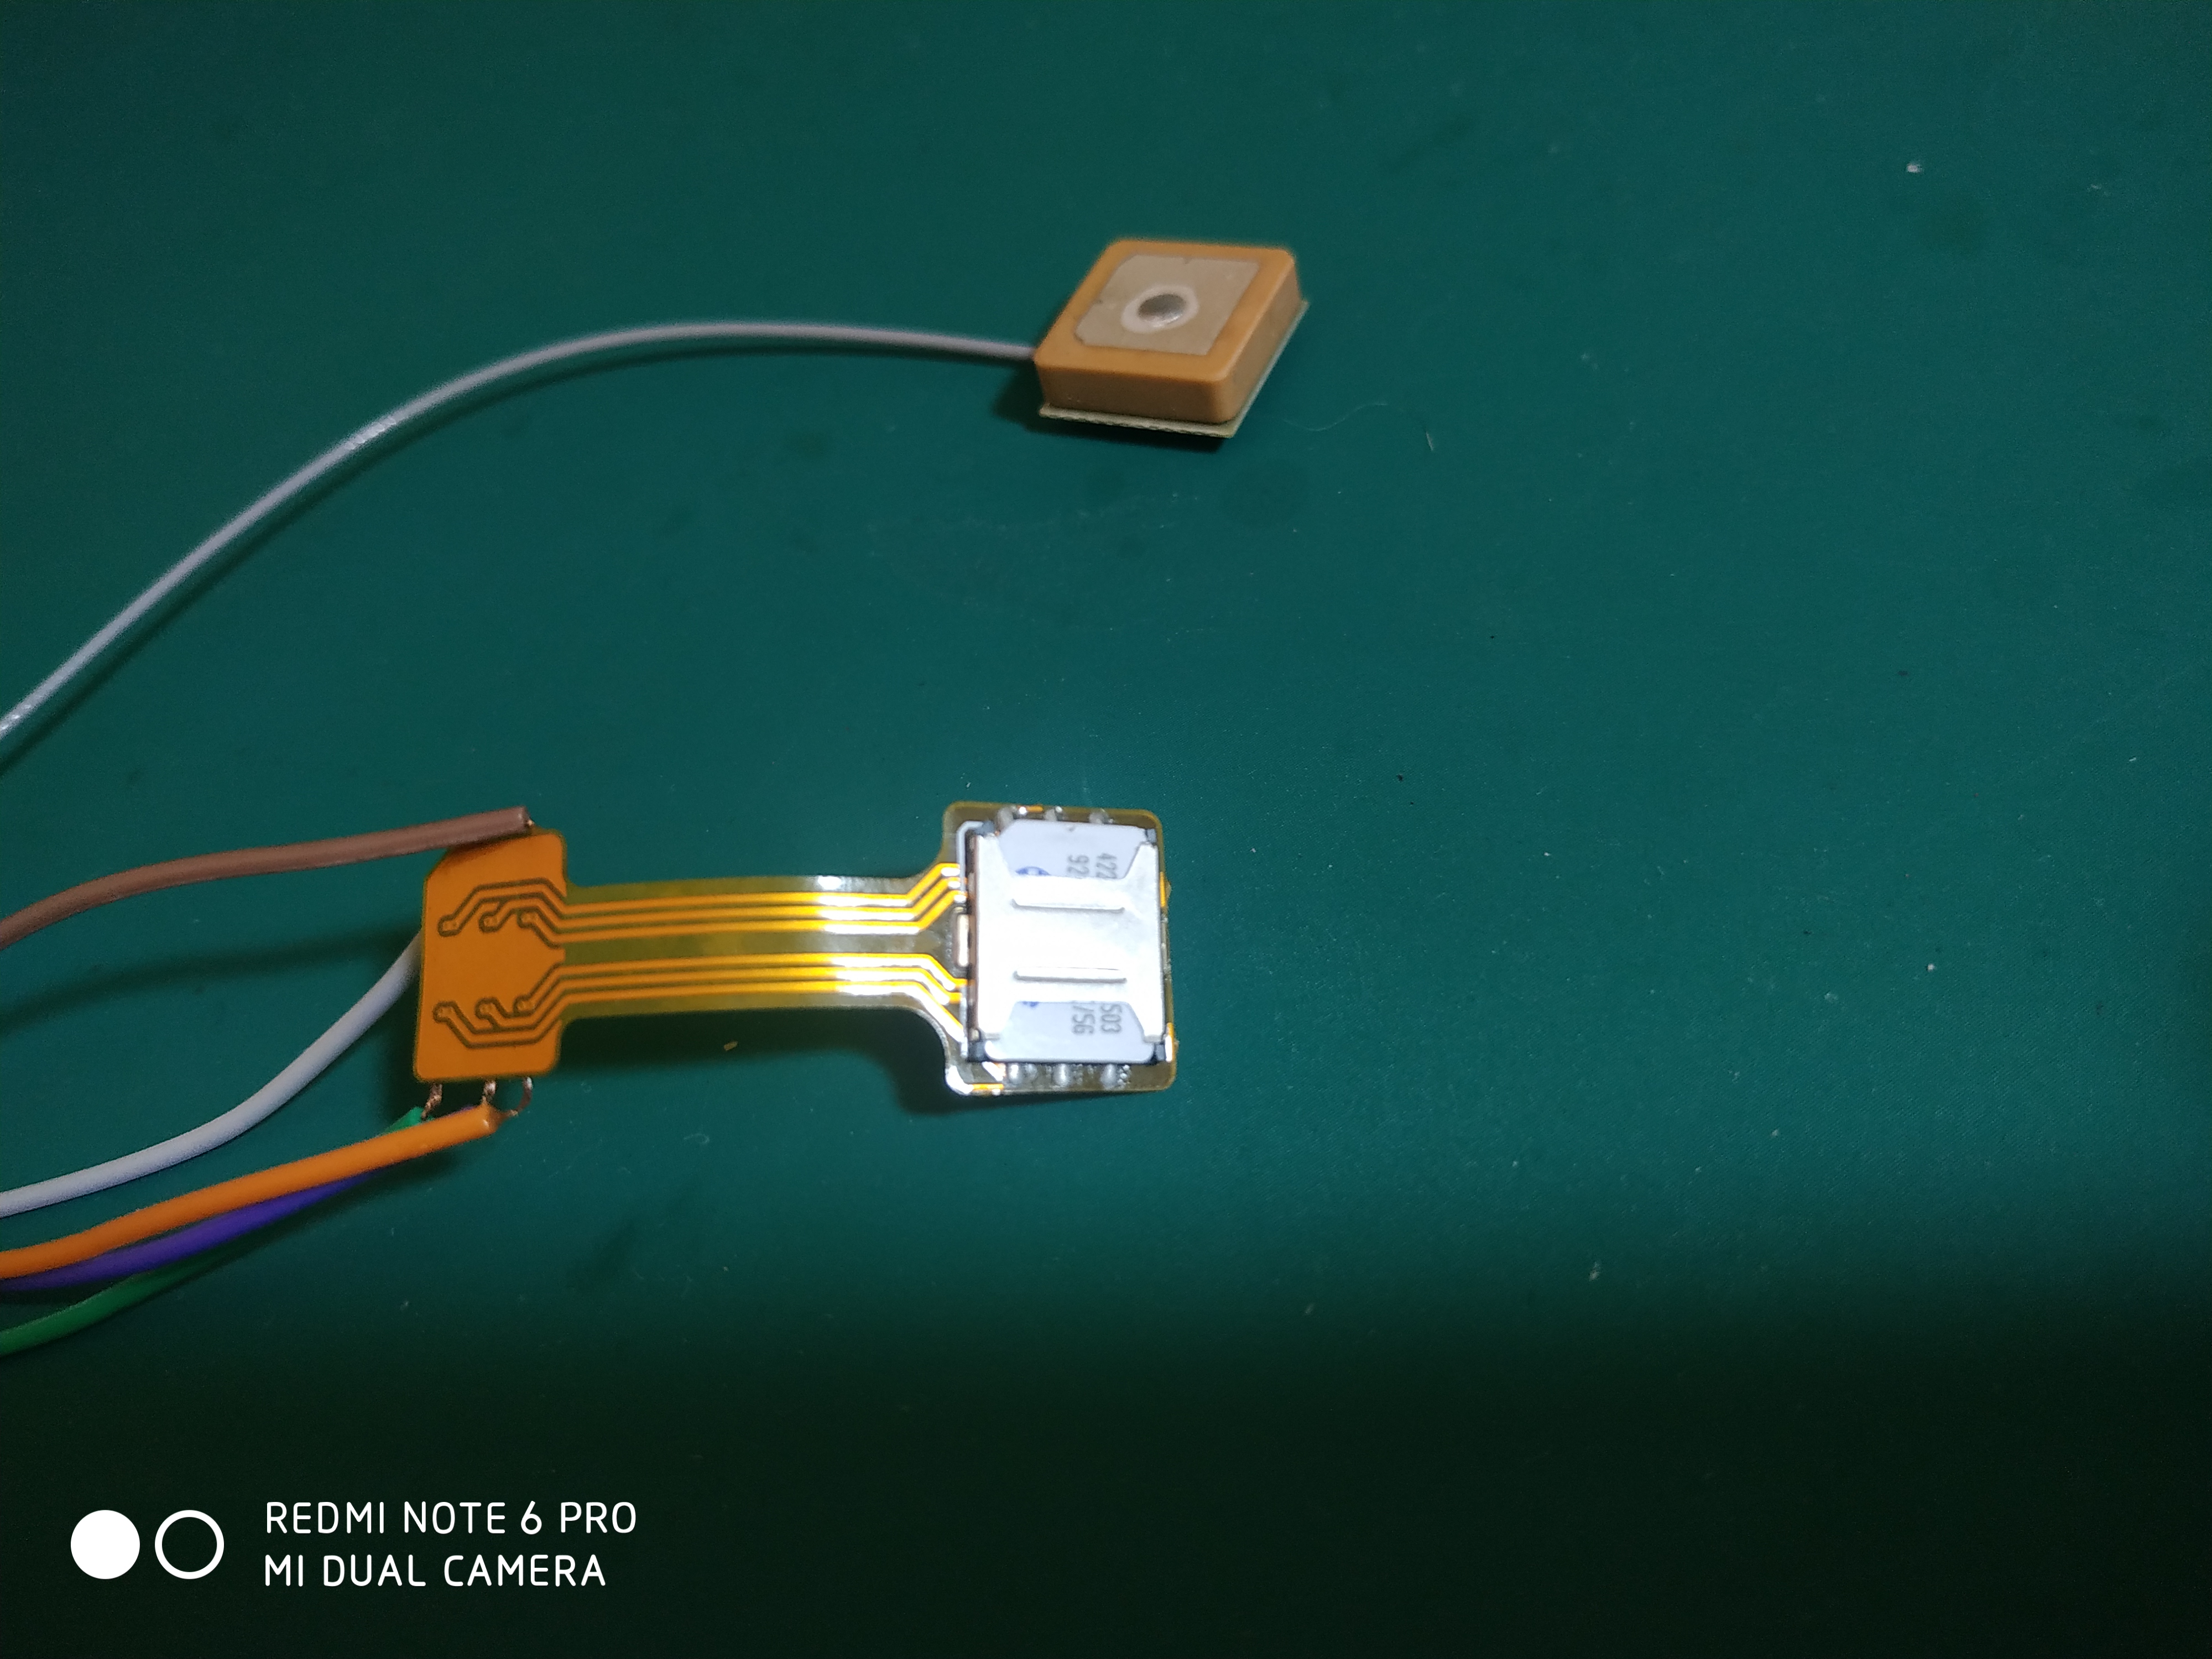
From my initial testing and evaluation of Makerfabs Maduino Zero 4G LTE board the micro sim card socket broke because I use a miro sim to nano sim card converter to connect my nano sim card. Because of that I wired a nano sim card board to the Makerfabs Maduino Zero 4G LTE board.

AT_command_demo:
To get familiar with AT commands for SIMCom 7600X, I recommend to try the AT_command_demo.ino example program which can be found in the Maduino-Zero-4G-LTE Github Repository. You can use the Arduino IDE Serial Monitor to input commands.

Maduino Zero 4G GPS Code:
This code is originally made by techiesm, so credits to the creators. However the conversion of GPS NMEA to decimal does not work for the Philippines. I fixed it to work in the Philippines, but the code can be improved further. This has been tested using Arduino IDE 2.0. Make sure you have board support for Arduino Zero.
/*
 *
 * This is the code for the Project
 *
 * 4G GPS Tracker using All new Blynk 2.0
 * It's full tutorial is uploaded on our YouTube channel
 * https://www.youtube.com/techiesms
 *
 *
 * Code written by Dhruv Soni for techiesms on 02/07/22
 *
 *
 *
 */

 /* This GPS tracker Arduino code used Marduino Zero 4G LTE(SIM7600X) Board from Makerfabs
  * GPS Data is read and GSM is used to send GPS data to Blynk
  * This uses Blynk restful HTTP API to send GPS data to Blynk
  * https://docs.blynk.io/en/blynk.cloud/https-api-overview
  * The problem with this is that Blynk device appears offline. The best way is to use Blynk API
  * using TinyGSM library. https://github.com/vshymanskyy/TinyGSM
  * Example code from link below.
  * https://community.blynk.cc/t/map-widget-wrong-location/57692
 */


#include <stdio.h>
#include <string.h>

#define DEBUG true
#define MODE_1A

#define DTR_PIN 9
#define RI_PIN 8

#define LTE_PWRKEY_PIN 5
#define LTE_RESET_PIN 6
#define LTE_FLIGHT_PIN 7

// Get your token or auth from your Blynk Device and copy here.
String token = "add your blynk device auth token here";
String loc = "";
String longitude = "";
String lattitude = "";

//FUNCTION TO PASS AT COMMAND

String sendData(String command, const int timeout, boolean debug)
{
  String response = "";
  Serial1.println(command);

  long int time = millis();
  while ( (time + timeout) > millis())
  {
    while (Serial1.available())
    {
      char c = Serial1.read();
      response += c;
    }
  }
  if (debug)
  {
    SerialUSB.print(response);
  }
  return response;
}

//FUNCTION TO CHECK SIGNAL STRENGTH

int check_signal(void)
{
  while(1)
  {
    String sig = sendData("AT+CSQ",3000,DEBUG);
    int i=0;
    String strength;
    while(sig[i]!=':')i++;

    String loc_2 = sig.substring(i+2);

    i=0;
    while(loc_2[i]!=',')i++;

    strength = loc_2.substring(0,i);

    int strength_1 = strength.toInt();
    SerialUSB.println(strength_1);

    return strength_1;
  }
}

//FUNCTION TO GET LATITUDE AND LONGITUDE STRING

void gpsLocation(String local)
{
//  char* loc_2 = local;
//  int p=0;

  while(1)
  {
    int i=0;
    while(local[i]!=':')i++;

    String loc_2 = local.substring(i+2);

    i=0;
    while(loc_2[i]!=',')i++;

    lattitude = loc_2.substring(0,i);
    SerialUSB.println(lattitude);

    int j = i+3;
    int k = j;

    while(loc_2[k]!=',')k++;

    longitude = loc_2.substring(j,k);
    SerialUSB.println(longitude);

    return;

  }
}

//CONVERSION OF LATITUDE and LONGITUDE FROM NMEA to Decimal Degress
//This C function needs major improvement or replacement
//Return from AT+GPSINFO
//+CGPSINFO: 1424.515048,N,12057.739827,E,230123,074644.0,15.6,0.0,151.4
//Useful website to convert GPS NMEA to D.d decimal degrees.
//http://www.hiddenvision.co.uk/ez/?nmea_lat=1424.513029%2CN&nmea_lon=12057.735682%2CE
//Code references for converting GPS NMEA to D.d decimal degrees.
//https://stackoverflow.com/questions/36254363/how-to-convert-latitude-and-longitude-of-nmea-format-data-to-decimal

String conversion(String local, int i)
{
  String str_end;
  String str_init;
  if(local[0]=='0'){
      SerialUSB.print("local = 0\r\n");
      str_end = local.substring(3);
      str_init = local.substring(1,3);
      int val = str_init.toInt();
      double deci_val = str_end.toDouble();
      double new_value = val+(deci_val / 60);

      if(i == 1)
      {
        new_value = new_value * 10;
      }

      String final_val = String(new_value,5);

      return final_val;
   }
  else if(local[0]!='0')
  {
      SerialUSB.print("local != 0\r\n");
      if(i == 0)
      {
        str_end = local.substring(2);
        str_init = local.substring(0,2);
      }
      else if(i == 1)
      {
        str_end = local.substring(3);
        str_init = local.substring(0,3);
      }

      int val = str_init.toInt();
      double deci_val = str_end.toDouble();
      double new_value = val+(deci_val / 60);
      String final_val = String(new_value,5);

      return final_val;
  }
}

//FUNCTION TO PASS LOCATION IN BLYNK API

void map_loc(String lat1,String lon1)
{
    String lat = conversion(lat1, 0);
    String lon = conversion(lon1, 1);

    SerialUSB.print("lattitude = ");SerialUSB.println(lat);
    SerialUSB.print("longitude = ");SerialUSB.println(lon);

    // Important to set the correct blynk server for Philippines is sgp1
    // You can find the blynk server at lower right of blynk webpage
    String http_str = "AT+HTTPPARA=\"URL\",\"https://sgp1.blynk.cloud/external/api/batch/update?token=" + token + "&V9=" + lon + "&V9=" + lat + "\"\r\n";

    SerialUSB.println(http_str);
    sendData("AT+HTTPINIT\r\n", 3000, DEBUG);
    sendData(http_str, 3000, DEBUG);
    sendData("AT+HTTPACTION=0\r\n", 3000, DEBUG);
    sendData("AT+HTTPTERM\r\n", 3000, DEBUG);
}

void setup(){
  SerialUSB.begin(115200);
  //while (!SerialUSB)
//  {
    ; // wait for Arduino serial Monitor port to connect
//  }

  delay(100);

  Serial1.begin(115200);

  //INITIALIZING GSM MODULE
  pinMode(LTE_RESET_PIN, OUTPUT);
  digitalWrite(LTE_RESET_PIN, LOW);
  pinMode(LTE_PWRKEY_PIN, OUTPUT);
  digitalWrite(LTE_RESET_PIN, LOW);
  delay(100);
  digitalWrite(LTE_PWRKEY_PIN, HIGH);
  delay(2000);
  digitalWrite(LTE_PWRKEY_PIN, LOW);

  pinMode(LTE_FLIGHT_PIN, OUTPUT);
  digitalWrite(LTE_FLIGHT_PIN, LOW); //Normal Mode
  // digitalWrite(LTE_FLIGHT_PIN, HIGH);//Flight Mode

  SerialUSB.println("Maduino Zero 4G Test Start!");

  SerialUSB.println(sendData("AT+CGMM\r\n", 3000, DEBUG));
  sendData("AT+CPIN?\r\n",3000,DEBUG);
  sendData("AT+COPS?\r\n",3000,DEBUG);
  sendData("AT+CNUM\r\n",3000,DEBUG);

  //INITIALIZING GPS MODULE
  sendData("AT+CGPS=0",3000,DEBUG);
  sendData("AT+CGPS=1",3000,DEBUG);
  delay(60000);
}

void loop(){
    //CHECKING SIGNAL STRENGTH
    if(check_signal()>=10)
    {
      loc = sendData("AT+CGPSINFO\r\n",3000,DEBUG);
      gpsLocation(loc);
      if(lattitude!=""&& longitude!="")
      {
        map_loc(lattitude,longitude);
      }
      delay(5000);
    }
}
Blynk Setup:
Create a new template and add map widget.

Create a Datastream with Data Type set to GPS and alias and name set to “V9”.

Select magnifying glass and create a new device from template.

Set device name.

Go to device info of your new device. Copy auth token to the arduino code.

Maduino Zero 4G GPS Tracker Demo:
Bluetooth Remote Control Car
Series of videos on creating a Bluetooth remote control car project.
Bluetooth Remote Control Car Introduction:
CCS Project:
Bluetooth Soil Moisture Monitoring
Series of videos on creating a Bluetooth soil moisture monitoring project.
Bluetooth Soil Moisture Monitoring Introduction:
Sensor Controller Studio Project:
CCS Project:
Sensor Controller
Series of videos on creating your first Sensor Controller project.
Sensor Controller Introduction:
Sensor Controller Studio Project:
CCS Project Part 1:
CCS Project Part 2:
Bluetooth Game Controller
Series of videos on creating a Bluetooth game controller.
Bluetooth Game Controller Introduction:
Testing The Buttons And Joystick:
HID Emu Keyboard:
CCS Project:
Bluetooth Weighing Scale
Series of videos on creating a Bluetooth weighing scale.
Bluetooth Weighing Scale Introduction:
HX711 Driver:
Reusing Custom Bluetooth Service:
Writing HX711 Weight Data To Weight Data Characteristics:
Bluetooth Tracker
Series of videos on creating a Bluetooth tracker.
Bluetooth Tracker Introduction:
Key Press:
SimpleKeys Profile:
Proximity Profile:
Bluetooth Environmental Sensor for Mushroom Farm
Series of videos on creating a Bluetooth environmental sensor for mushroom farm.
Bluetooth Temperature And Humidity Introduction:
Reading The BME280 Environmental Sensor:
Temperature And Humidity Custom Bluetooth Service Part 1:
Temperature And Humidity Custom Bluetooth Service Part 2:
Sample Rate Multiplier:
